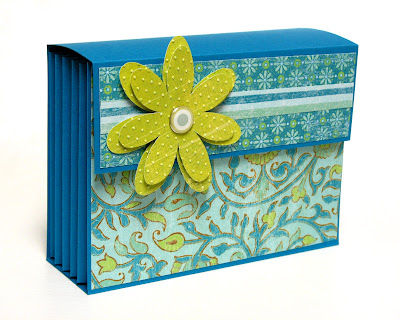
I had so much fun making this expandable card box and think you will too. For complete instructions, scroll down and watch the video. For your convenience, you will also find measurements below. Enjoy!
Measurements for Box:
Cut one piece of Bazzill card stock 7 ½ inches x 12 inches. With the 12 inch side going along the top, score at 2 ½, 5, and 10 ½ inches.
Cut one piece 7 ½ x 8 inches. With the 8 inch side going along the top, score at 2 ½.
Cut two pieces 6 x 5 ¼ inches. With the 6 inch side going across the top, score every ½.
Cut 5 pieces at 7 ½ inches by 5 ¼ inches for the inserts.
Decorative Paper/I used K and Company papers and BasicGrey for the flowers
Cut one piece 7 ¼ x 5 ¼ inches for bottom of box.
Cut one piece 7 ¼ x 2 ¼ inches for box flap.
Cut one strip 7 ¼ x ¾ for box flap.
Flower
Cut one flower at 3 ¼ and one at 3 ¾ using the blackout feature on the George Cartridge.
Wednesday, April 14, 2010
Expandable Card Box
Subscribe to:
Post Comments (Atom)


18 comments:
thank you so much for the wonderful tutorial. I will have to give this a try. thank you so much
Celeste
great tutorial. great card box
Good Job Linda!!! This is just what I needed for some cards I have made for gifts.Di
Thanks everyone for your nice comments. I would love to see your boxes.
Linda
Thank you Linda. What a great box. Making them right now for my Mom and Sister for Mother's Day. Great video, easy to follow. I do need to know where you got the magnetics? Can I use velcro? thanks again.
noradickey@hotmail.com
I purchased my magnets from our local scrapbook store. You might be able to find some on-line. They are the thin BasicGrey type. You could also use velcro or purchase other types of magnets.
Thanks for the great question.
Linda
this box is adorable, cant wait to make one of these.
I love your card boxes. I can't wait to try them. You did an amazing job on your video, You explained everything so well. It was very easy to follow. Now let's see if I can do one. Thank you so much for you time and instructions.
Carol
Wonderful video and project! I cannot wait to try this out... TFS
this is great!!!
Thanks for all the nice words!
Thanks for the tutorial. I definitely became a follower. I wanted to know if this box is for 5x7 size cards. I tend to make more 5x7 size cards more than any other size, but just really wanted to let u know, the box is great.
AWSOME, this will be my nest project. Thanks for sharing
Thanks for the great tutorial..this would also be a great Coupon Organizer.. I am going to use this Ideal, but cut done the inserts a little shorter so I can add some tab inserts..Thanks again
thank you very much for this great tutorial...i saw one of these on the net but not how to make it and i really thought it was a great idea...i received my scorpal yesterday so guess what i will be making tomorrow!!! l love your videos they make it so much easier..love your blog
I don't really understand the 2 1/2,5,10 1/2 inches part cos I don't really use inches...
I was planning to buy some clear plastic boxes to give cards as gifts until I saw your great tutorial. Your Expandable Card Box is so cute, "office supply-ie", and personalizable. Thanks so much for the great tutorial.
Post a Comment